Using Adobe Photoshop CS2 & higher
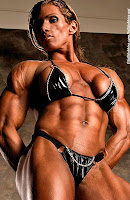
 1 Start with a good quality photo, as high-res as possible. I prefer an image at least 4 mb in size. Watch for pixel distortion because it will only be accentuated in the final morph. For this tutorial, I'll use Isabelle Turell, a beautiful all-around bodybuilder to begin with.
 2 Open the image in Photoshop
 • Select>All
• Copy & Paste. The image will be pasted on a new layer
• Click on the new layer and Select>All
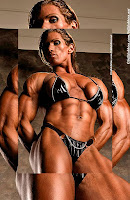
• Click Edit>Transform>Scale and make the image on the new layer smaller. The smaller image will be your final image size. The smaller you make it, the larger the muscles and breasts will be.
• Click on the eyeball next to layer 2 to hide it for now.
• Save the file as a .PSD file. Save often.
3 Now we want to define the morphed body parts.
• On the Paths window, click the New Path icon and select Path (1)
• Click on the Pen tool (2)
• Use the Pen tool to outline the areas you want to enhance. Make sure the original larger sized image is showing.
If you don't know how to use the Pen tool, here's a couple links to help
http://www.creativetechs.com/iq/adobe_pen_tool_cheatsheet.html
http://www.adobe.com/designcenter/video_workshop/?id=vid0037
• It's important to stay just inside the image area when outlining. We want to get the cleanest possible selection.
• When outlining muscles, I try outlines each muscle group. It takes longer, but I feel the end results look better.
4 Let's make big muscles & boobs
• Make sure you have the original large image layer selected in the Layers window
• We want to make each body part it's own layer. Click on the particular path you want to enhance (1). This is done by clicking on arrow tool on the side menu (or on a Mac, click option + command at the same time and the cursor will change.) Click the desired path and you will notice dots appear.
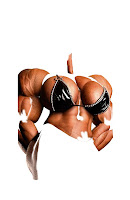
 • Make it a selection (2), click off the path layer (don't want to copy the path), then Copy & Paste. It will create a new layer with just that body part
• Repeat this process until all body parts are on their own layer.
• Click on the eyeball next to the original larger image layer to hide it, then unhide the smaller image layer
Try this tutorial if you're stuck.
5 Bodyshaping
• Click on a particular layer you want to shape. I find it useful to hide all the other layers so I can concentrate on the individual part.
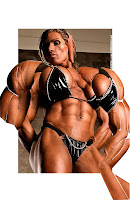
• Use the Move tool to move the body part to the desired spot over the smaller image.
• Most the time, the image will need to be shaped to proportionally fit. There are many options under Edit>Transform, such as Warp & Distort.
• The more you distort the image, the more the pixels are distorted and look fake. I use Filter>Sharpen>Unsharp Mask to enhance the pixels (Tip).
• Repeat this step until all the body parts are where you want them and the desired shape

6 Detailing - There's some artistic skill and/or a good eye needed here. It's not necessary, but will make the difference between a great or fake looking morph. Keep referencing the original to see if it looks natural. If you're not familiar with these or other tools, there are some great tutorials online.
• Blend it into the background. I use the Eraser and/or Blur tools to blend the edges into the smaller background image if needed.
• For highlights and shadows, I use either the Dodge/Burn tool to lighten or darken an area (Tip) or select a color and use the Brush tool with settings on Multiply or Lighten.
• Fill in needed areas with the Clone Stamp tool or fix a blemish with the Healing Brush tool
7 Finishing
• At this point, all layers should be showing except the original larger one.
• Click Layer>Flatten Image to flatten all the layers into one image
• Use the Crop tool to crop the image to it's flattened smaller size
• There are many cool finishing techniques in Photoshop... go wild. I usually do Image>Adjustments>Brightness/Contrast and adjust the Contrast between +15 to +25. Then image>Adjustments>Hue/Saturation and adjust Saturation to -15 to make the skin tone back to normal after the contrast blows out the color. This seems to make the image look more dramatic and enhances the shadows and lights.
Morphing Tips: Light & Dark
Morphing Tips: Sharper Image
Morphing Tips: Proof your work


