
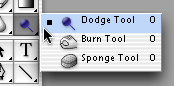
 The Dodge & Burn tool is one of the oldest and most underused tools in photo editing programs. Dodge is used to lighten the pixels and Burn is used to darken. Simply select the tool from the side drop down menu, select size, edge hardness and exposure of the brush and you are ready to go. Although I vary the size and hardness depending on the area & definition I'm trying to achieve, I usually keep the exposure at 15% so it doesn't appear too drastic. You can always go back with another pass to increase the effect.
In some cases, burning an area increases the saturation or intensity of the pixels, making them appear much more vibrant than the rest of the piece. The Sponge tool can be used to desaturate the newly burned area and make it look right with the surrounding image.
 Dodge doesn't work if you're trying to darken very light pixels. Then it's time to use the Paintbrush. In order to achieve the best looking results, use the Eyedropper tool to sample a dark color from the general area. I there isn't one, black works best. The key is to select Multiply or Darken from the brushes mode menu. This will darken the pixels with the selected color but keep the integrity of the underlying image intact.
See the Full Tutorial and Happy Morphing


